EMERGENCY WATER NEAR ME
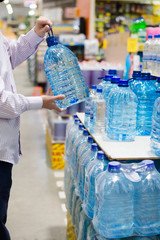
You might be asking yourself: What's the best way of finding emergency water near me? Glad you asked!
The best way is simply to have emergency water on hand! It's not as hard as you might think. Even if you live in a tiny apartment, there's always space to store an amount of emergency water.
Having emergency supplies of all kinds (food, water, toiletries, medical supplies, etc.) on hand is a good way of being organized and well prepared for any emergency situation that might pop up unexpectedly.
This page will cover the topics of why it's important to have emergency water on hand, the effects of not having enough water and how to have a good supply of water on hand (including containers and safe storage practices).
EMERGENCY WATER NEAR ME
EFFECTS OF NOT HAVING
ENOUGH WATER
Water is needed for almost every process in the body including:
- regulating body temperature through sweating and breathing
- aiding in digestion by forming saliva and breaking down food
- moistening mucous membranes
- helping to balance the pH of the body
- lubricating joints and the spinal cord
- helping the brain make and use certain hormones
- helping transport toxins out of the cells
- eliminating waste through urine and breath
- delivering oxygen throughout the body
Water helps the body remove the
toxins from cells and excrete them through the urine and breath. Without water,
the body cannot do this efficiently, causing toxins to build up. A toxic
buildup harms your kidneys, which process the removal of toxins from the body.
If the kidneys fail, toxins build up even further, causing
widespread organ failure and death.
EMERGENCY WATER NEAR ME
SIGNS OF DEHYDRATION
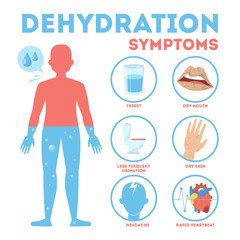
Dehydration may cause other notable changes in the body such as:
- sluggishness or lack of energy
- headache
- dizziness, confusion, heat stroke or heat cramps
- stiff joints that may stick or not work properly
- raised or unregulated body temperature
- swelling in the brain
- sharp changes in blood pressure
- seizures
Dehydration can happen very quickly. A person may
go from feeling thirsty and slightly sluggish on the first day with no water to
having organ failure by the third day. Dehydration does not affect everyone in
the same way. Each person will have a different tolerance level to dehydration
and may be able to survive without water for a longer or shorter periods than
someone else.
By now you should be convinced that you need
an emergency supply of water!
EMERGENCY WATER NEAR ME
CREATING AN EMERGENCY
WATER SUPPLY
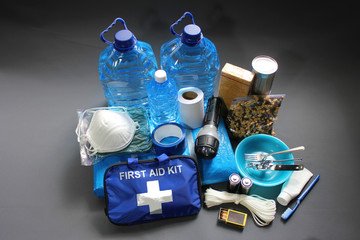
It’s important to plan ahead to ensure you and your family have access to clean drinking water at home, the office, the school, or other places where a water-related emergency may occur.
Remember, most people don't plan to fail, they fail to plan!
Storing unopened commercially bottled water is one of the most reliable and least expensive sources of water in an emergency. The CDC recommendations are as follows:
- Store at least 1 gallon water per person per day for at least 3 days for both drinking water and sanitation. Two weeks is even better.
- Consider storing more than this if you live in a hot climate or have pregnant women and/or people who are sick living with you.
- Observe the expiration dates for store-bought water. The recommendation is to replace it ever 6 months.
- Keep a bottle of unscented liquid household chlorine bleach containing 5% to 9% sodium hypochlorite on hand to use to disinfect your water if necessary and for general cleaning and sanitizing purposes.
EMERGENCY WATER NEAR ME
WATER CONTAINERS
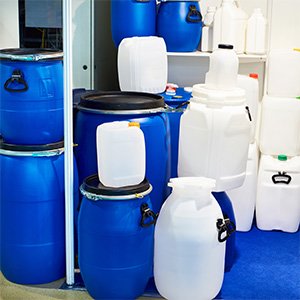
When choosing a container to store water, the CDC recommends the following:
- Use FDA-approved food-grade storage containers. These can easily be found at surplus, camping supply stores and other emergency preparedness places on the internet.
- If you cannot find or cannot afford food-grade water storage containers, be sure the container you chose has:
- A top that can be closed tightly
- Is made of durable, unbreakable material (no glass)
- Has a narrow neck or opening so water can be easily poured out.
- Do not use containers that have previously been used to store liquid or solid toxic chemicals (bleach, pesticides, etc.)
Before filing the containers with safe water, the also recommends cleaning and sanitizing the water storage containers in the following manner:
- Wash the container and rinse completely with water
- Sanitize it with a solution of 1 teaspoon of unscented bleach to 1 quart of water (bleach should be 5 to 9% sodium hydrochlorite)
- Cover the container rightly and shake well making sure it touches all the inside surfaces of the container.
- Let the container air-dry or rinse it well with safe water.
- Label the container "drinking water" and include the storage date so you know when to replace it at the 6 month interval
- Do not store the container in direct sunlight
- Do not store the container in areas near other toxic substances such as gasoline, pesticides, etc.
The CDC also recommends these tips for safely removing the water from the container:
- Use a clean scoop or other device each time you remove safe water from the container to avoid contaminating the remaining water in the container.
- Try not to touch the water or insides of the container with your hands
- Never scoop safe water with your hands.
Obviously if you used a narrow neck container, you won't have to scoop the water.

EMERGENCY WATER NEAR ME
POTABLE VS. NON-POTABLE
Water deemed safe is called potable. Most city water has treatment plants that make the tap water potable. Non-potable water may come from other sources such as rainwater collection, rivers, streams and even stored water that has been in the container longer than 6 months.
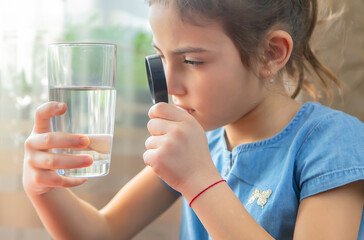
There are ways to make sure your water is safe for drinking and home use. These methods include:
- Using unscented chlorine bleach containing 5% to 9% sodium hypochlorite. Pour two drops of bleach for every liter of water and 8 drops for every gallon and let stand for 30 minutes. While this method kills bacteria and some viruses, it requires more time to fight impurities such as Norovirus & Giardia (wait about 1 hour and 45 minutes respectively)
- Chlorine tables can destroy bacteria and viruses between 30 to 45 minutes. These are good to have on hand in your emergency preparedness kit for traveling. The pills are easy to use as they do not require measuring.
- Reverse Osmosis is another way to make water potable and safe. It moves the water with force through a semi-permeable membrane so that it removes impurities. It allows the water to pass through the membrane while trapping the larger particles. It removes minerals and helps soften water. The downside is that RO systems are usually quite expensive and require regular maintenance.
- Using a water filter is another way to purify your water. Alexapure or Berkey as names you might be familiar with. A proper filtration device has activated charcoal in it to extract pollutants. As the water moves through the carbon, the impurities stick to the surface of the carbon producing clean water. Water filtration water pitcher filters are usually not recommended for water that is not-potable already as the filtration systems are not as sophisticated. Regardless of which system you choose, replacing the filters at least every 6 months or less is recommended. This can get pricey and might not be an option for everyone.
- Boiling your water to purify it is one of the oldest, simplest and economical methods. The water must be boiled at above 70 degrees Celsius to destroy microorganisms and remain at that temperature for a recommended period of time. It works best if you pass the water through a coffee filter or clean cloth to take out any large particles first. Water should boil for at least 60 seconds at the recommended temperature but if you are in an elevation of 5,000 or more, you will need to let it boil for 3 minutes. Removing it to a clean container improves the taste.
- Distilling water involves gathering the water droplets from evaporated steam and is considered the best way to remove pollutants from drinking water. You need a cooking pot/kettle, a bowl or other container to collect the moisture. You should also get a tube to allow the vapor to pass through as it produces the heat. The downside to this method is that it also destroys vital minerals and salts in the water; this is easily corrected by tossing in some supplements and/or eating mineral rich foods.
- UV light purifiers are devices that take the pathogens out of the water. They come in the form of a pen-shaped light built into a water bottle. Pass the water through a coffee filter or clean cloth first to remove sediments and large particles or it doesn't work. Turn the light on and place it in the water. Move it around the water for the time recommended in the manual. Remove the penlight and consume the water.
- Iodine treatment can play a significant role in purifying water. Iodine destroys harmful microorganisms at a cellular level. It will destroy Giardia after being in the water for 50 minutes or more but does not destroy some parasites such as Cryptosporidium. To use in tincture form, mix two drops for each quart of water. If water looks cloudy, put in another 10 drops for each quart and let sit for 30 minutes before use. All forms of iodine react to light so be sure it is stored in dark-colored bottles. CAUTION: DO NOT USE THIS METHOD IF YOU HAVE THYROID PROBLEMS, ARE PREGNANT AND DO NOT USE ON CHILDREN WITHOUT CONSULTING YOUR DOCTOR FIRST.
EMERGENCY WATER NEAR ME
WHERE TO STORE THE WATER
Lastly, where should I store the water? The answer depends on where you live and your individual living spaces.
If your living spaces are not well organized, then check out the tips on Start Here page to help you get started.
While everyone's situation may be different, one good place to consider storing some emergency water is a space that is often over-looked -- under the bed! In our home, we have what we jokingly refer to as "water beds" simply because that is where it was most convenient to store water for emergencies.
Our emergency water came in handy recently when we had a plumbing problem, and the water was off for a couple of days. We were both glad to have that emergency water on hand!
I hope you will consider the time spent on this page useful and may you never run out of water in emergencies!
Click the lavender bar on the left and subscribe to the RSS feed to be notified of new listings as they become available.
Links to Other Information
Check out these pages for other helpful information related to emergency preparedness:
- Best Emergency Foods
- Emergency Water Near Me
- Food Preservation
- Food Safety Tips
- Food Storage Tips
- Medical Survival Kit
- Water Security Solutions
Did you like this? Please share it! Thanks in advance.
No matter where you are in life (stay-at-home mom, full or part time employee, retired, etc.) you can make a good income with a website. Whether you write books, make crafts or something else, I highly recommend SBI. It's the reason for this website. Check it out below and become another solopreneur!
Hello! This is Shelly Morton, the author of this website. I know you hear a lot of hype about making money from home and building a successful website. I speak from experience as a solopreneur, I have succeeded with Solo Build It! There is simply no better way to build an online business. Nothing else compares. It's not a "get rich quick" scheme. SBI provides you with all the tools and tips you need to be successful. You put in the work and SBI will help you succeed! SBI is simply the BEST way to get started for any "solopreneur."
Home|About Me|Site Map|Contact Me|What's New?|

